Well, a couple of things came up that changed my plans to glue the back onto the sides. First was the Old Settlers Music Fest. This is usually the first outdoor music event of the year for us. B and I spent the Friday and Saturday enjoying the central Texas springtime weather listening to some really fine music. We caught some really fine music that weekend: Uncle Earl, Marley's Ghost, Del McCoury, Keller Williams, Tony Rice and Peter Rowan, Eddie From Ohio, Monte Montgommery and more. There was also a tribute to Vassar Clemens. And as always, the various workshops. I caught the Mandolin and Guitar workshops this year.
The second issue was the weather. The last couple of weeks have been pretty humid. Lots of rain here in central Texas. I was hesitant to glue two major pieces together when the humidity in the shop was generally more than 50%. The third thing was a lack of fiberglass rods for my go-bar deck. That is the contraption I use to clamp various parts together when gluing. I will show a picture in the near future. I ordered some more rods from Into The Wind. They supply kites and kite supplies and have really reasonable prices on fiberglass rods.
 Preparing the Sounboard
I had joined the two halves of the soundboard a couple of weeks ago. Last weekend I used my router sled to reduce the thickness down to ~3.2mm. I then switched to a scraper to remove most of the marks left by the router bit and get the thickness down to ~2.9mm. The last bit was removed with an RO sander and 80 grit paper. The final thickness is ~2.8mm.
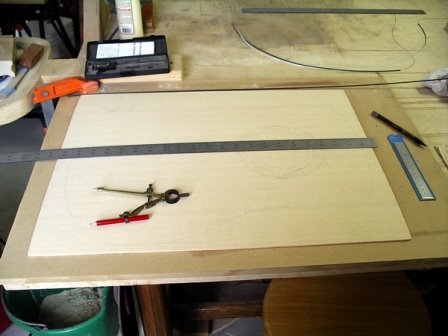
With the soundboard at the final thickness, I started on the rosette. First, I determined the placement of the soundhole. I have decided to use the Martin 'short' scale for this one. The short scale is 24.9" while the long scale is 25.34". The shorter distance from nut to bridge means the the soundhole and bracing will move slightly relative to the long scale. With the center of the soundhole marked, I layed out the rosette.
I will be using a piece of spalted Maple bounded by two pieces of b/w/mahogany/w/b purfling strips. The purfling strips have a little flame in them, and will add a nice contrats between the maple and the spruce soundboard. I got the strips and the spalted maple from RC Tonewoods.
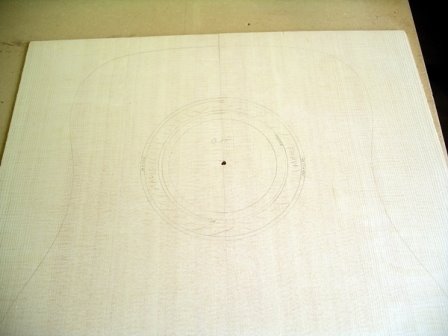
After marking the rosette on the soundboard using a compass, I also mark it on the maple. I use a dremel with a downcut bit and the Stew-Mac rosette jig to make the cuts.
First I make the outer cut on the outside of the maple. I then adjust the jig so the router bit is just inside the outer edge of the maple circle and make a cut in the soundboard.
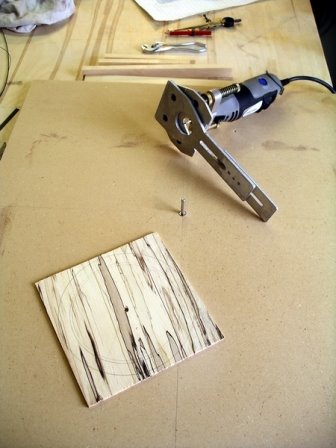
I go through the same process for the inner edge of the maple ring and the inner edge of the trench in the soundboard. After the area for the maple ring is defined on the soundboard, I route out the inside of the ring, then test the fit of the maple ring. The purfling strips are bent on a hot pipe to the approximate size of the ring.
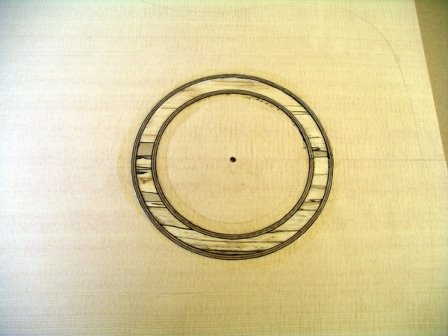
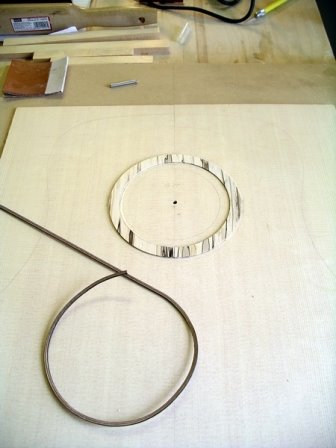
I had to take off just a tiny bit more from the edge of the trench to get the maple ring to fit. When I was satisfied with the fit, I flooded the trench with CA glue and pressed the ring into it. After about 20 minutes, the glue had dried enough and I leveled the maple ring until it was pretty much flush with the surface of the soundboard.
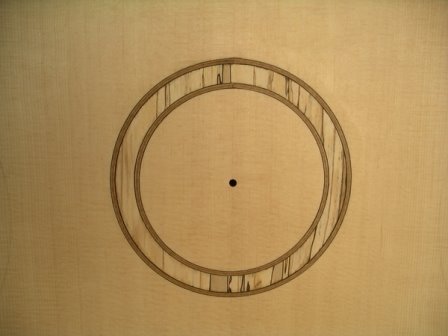
The last step was to cut channels for the purfling strips on the inner and outer side of the maple ring. I glued the purfling in using Titebond glue. The Titebond has enough moisture in it to cause the wood to swell, closing up any gaps. I put a piece of wax paper over the rosette and placed a weight on it, leaving it to dry over night.
The next day, I scraped the surface of the purfling flush with the soundboard and cleaned up all the glue on the surface.

No comments:
Post a Comment